I don’t know about you, but setting up CI and dev-ops tasks freak me out. There are so many different platforms, libraries and configurations to set up just right that I’m usually overwhelmed. But what if there is a more developer-friendly way?
Let’s look at how to set up a basic continuous development workflow using GitHub Actions with Gradle. No Jenkins, no external build servers, no fuss. All you need is a configuration yaml file in your repository.
Prerequisites for GitHub Actions with Gradle
- project built using Gradle
- GitHub repo for that project
Note that at the time of writing GitHub Actions are free, within 2000 build minutes per month for public repositories, but this is subject to limitations and can change at GitHub’s discretion.
Sample Code
I will use a simple Spring Boot project build using Gradle for the purpose of this demo.
Setting Up GitHub Actions Config for Gradle
What do we need to do to enable GitHub Actions?
First create a directory: .github/workflows in the repo’s root.
Then create as many yml files as needed to define your CI/CD pipeline. You may have multiple configurations based on branch patterns and events (push/merge).
My basic yml file looks like this:
# CI Workflow for all pushes
name: Run build on push
on: push
jobs:
gradle:
strategy:
matrix:
os: [ubuntu-latest, windows-latest]
runs-on: ${{ matrix.os }}
steps:
- uses: actions/checkout@v2
- name: Set up JDK 1.8
uses: actions/setup-java@v1
with:
java-version: 1.8
- name: Grant execute permission for gradlew
run: chmod +x gradlew
- name: Build with Gradle
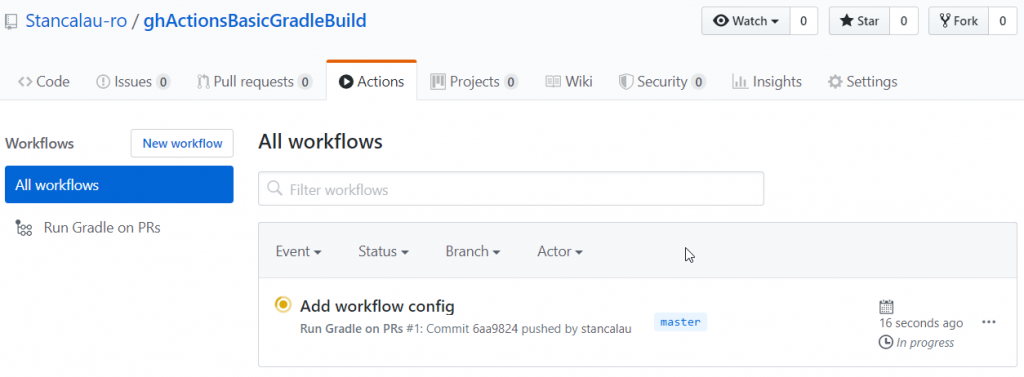
run: ./gradlew buildWhen I pushed this file, it immediately started a build:
Note: It is important to also push the Gradle wrapper-related files, otherwise you will get errors similar to the following:
- chmod: cannot access ‘gradlew’: No such file or directory
- Could not find or load main class org.gradle.wrapper.GradleWrapperMain
To make sure this runs smoothly, run >gradle wrapper to create those files locally, make sure you add the following files to the commit: gradle/wrapper/gradle-wrapper.jar, gradle/wrapper/gradle-wrapper.properties, gradlew, gradlew.bat. Note that some .gitignore settings may exclude these files so make sure to add them manually in that case.
Can I use gradle build instead of gradlew build? Yes, you can but it is recommended to use the wrapper so you always use the same version of Gradle and avoid failed builds.
Do I Have to Manually Create YMLs?
Writing GitHub Actions yaml files yourself is an option, but GitHub offers an online helper and editor to get you started in minutes:
1. When first accessing the Actions tab, you get this nice workflow starter.
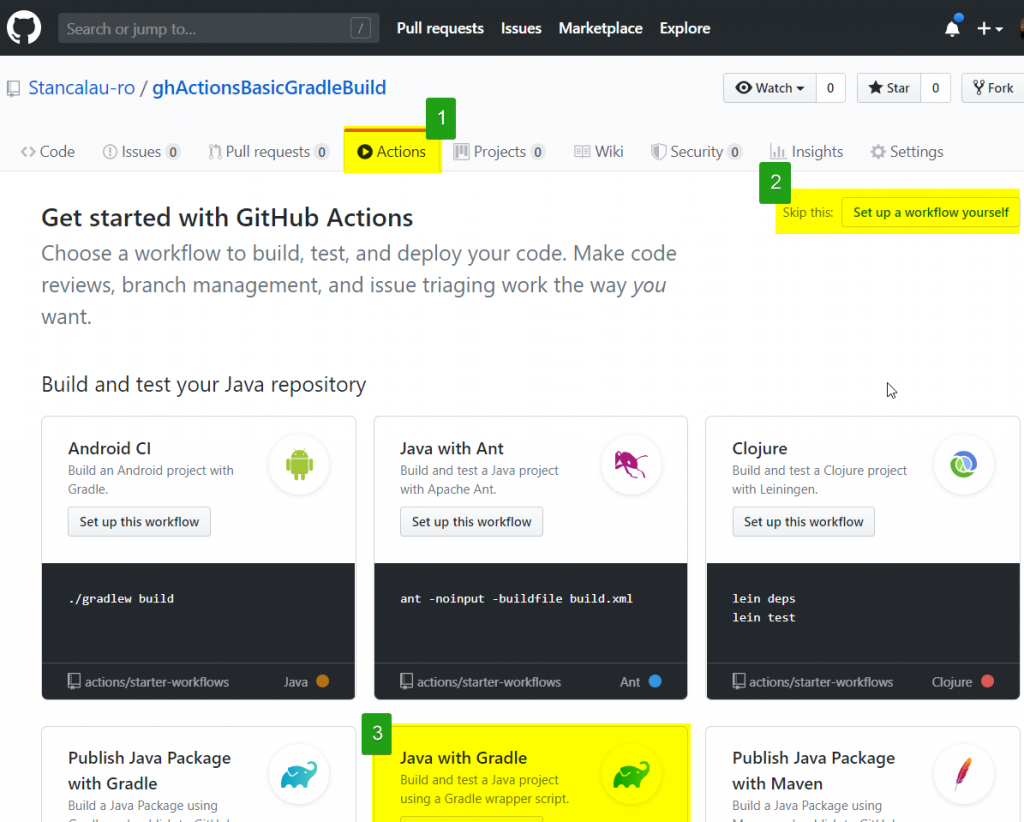
2. Option 2 will immediately create a default yml file with minimum settings.
3. Below you can find quick setup options including Gradle build. These will create minimum configurations that can work with the technology of choice.
Let’s click on Java with Gradle:
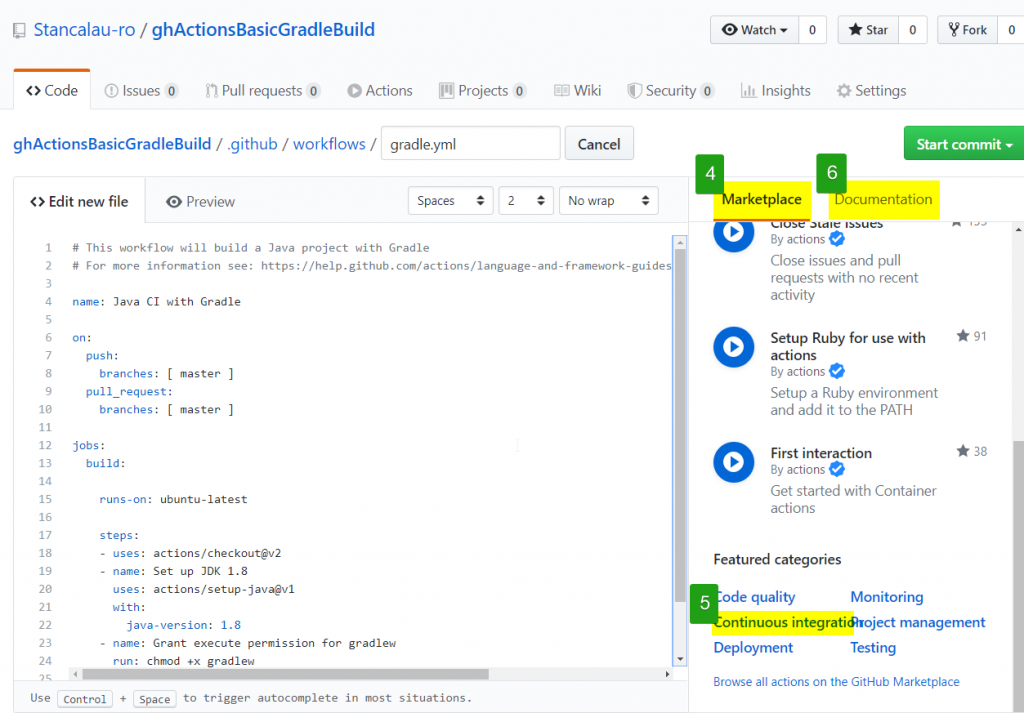
4. Using the Marketplace tab, you can quickly browse to other available GitHub Actions to add to your CI workflow.
5. Quickly filter by category to find the right Action.
6. To find your way around the yaml settings, the Documentation tab offers great information about possible property values.